
My Janome Horizon 9450, from the new Professional line of machines, is my passion; it is a beyond fabulous with so many features and unequaled stitch quality!
I’ve been working on a new quilt recently which I hope to share very soon. If you follow me on social media (Facebook at Kimberly Einmo or Instagram at keinmo) you may have seen sneak peeks of this sunny, ‘fruity’ project I’ve been stitching. In the process, I’ve been trying some differnt techniques and features on my fabulous Janome 9450 and I have come up with a fun, easy and fanciful method to share with you because it opens up all sorts of possibilities for adding texture to your fabrics and pizzazz to your projects.
As part of the sampler quilt I’m making, there are three simple pineapple applique blocks. I could have just cut the shapes out of my chosen fabrics and machine appliqued them to the background fabric, but I wanted to make these blocks a bit more special; more eye catching. I’ve used my twin needle applique method on previous quilts and I share this in one of my lectures. I keep this in my arsenal of tried-and-true techniques but admittedly, I haven’t pulled this one out of my quilting quiver in quite a long time. Let me share it with you.
Twin Needle Texturizing
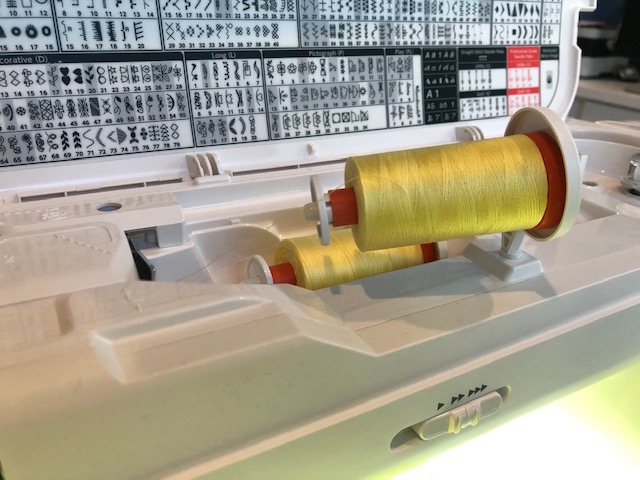
The first thing to do is find and engage your second spool holder because you’ll need to feed two threads through your machine.
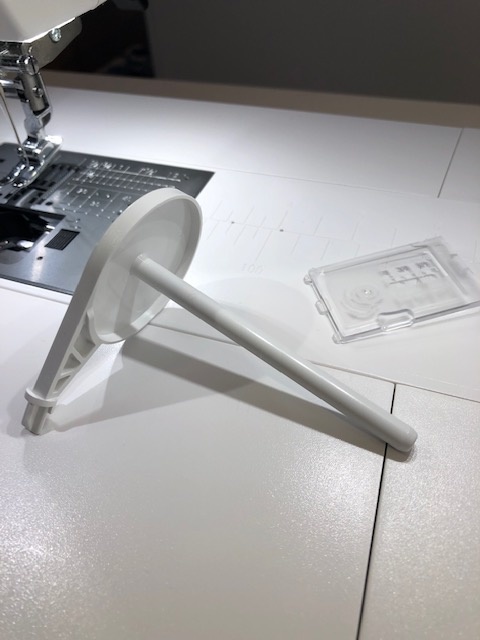
Once the second spool pin (holder) is engaged, follow your machine’s directions for using two spools to thread the machine. Pay careful attention as to how the threads are fed through your machine’s tension disk. Fortunately with the 9450, the machine adapts automatically so threading is very simple.
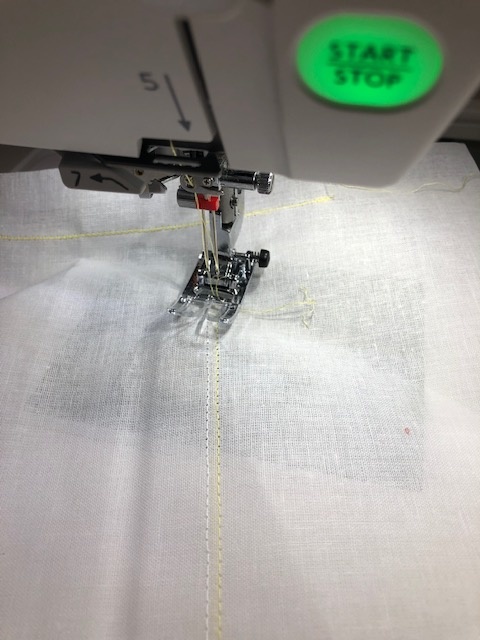
Always begin by stitching a line of straight stitches on sample fabric to see how the stitches and tension look. I highly recommend using starch on your fabrics prior to doing this technique. The fabric needs to be a bit stiff to handle the tension and produce pleasing results.
Change your needle to a twin needle; there are many different sizes available and the varying sizes will produce vastly different effects. Again, be sure to follow the manufacturer’s instructions for your particular make and model of machine. There may be a twin needle setting on most newer models to keep the machine safe during stitching which prevents you from selecting a stitch or stitch setting that would damage the machine when using a twin needle.
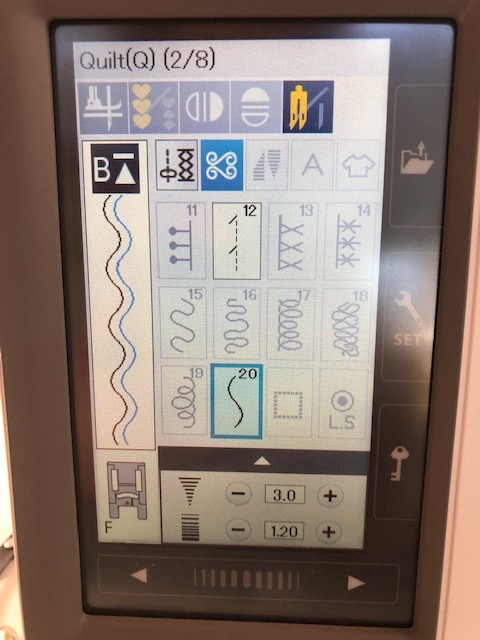
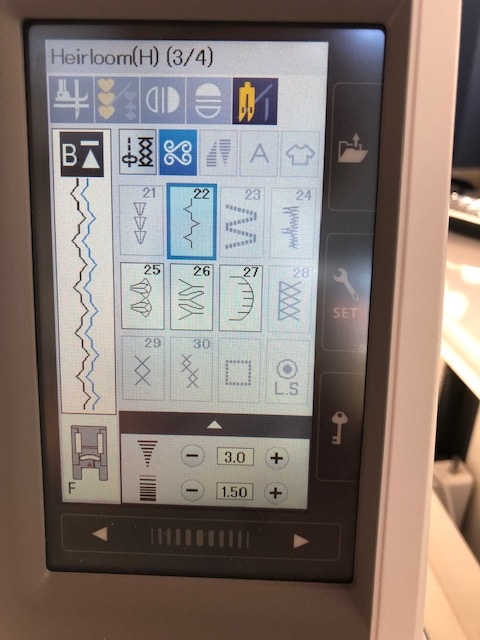
You can see the icon on the top right of the touch screen which shows I have engaged the twin needle. The icon becomes bright blue / yellow when selected and the other icons (features) are temporarily grayed out so they cannot be selected. I love that this machine is so “goof proof!” Any available stitches which can be safely stitched with a twin needle remain emboldened on the screen. I selected stitch #20, a serpentine stitch, from the decorative stitch menu. On the left side of the screen, you can see what the stitch will look like using a twin needle. And in many cases, you can adjust the settings such as the stitch length and stitch width for an even more custom effect.
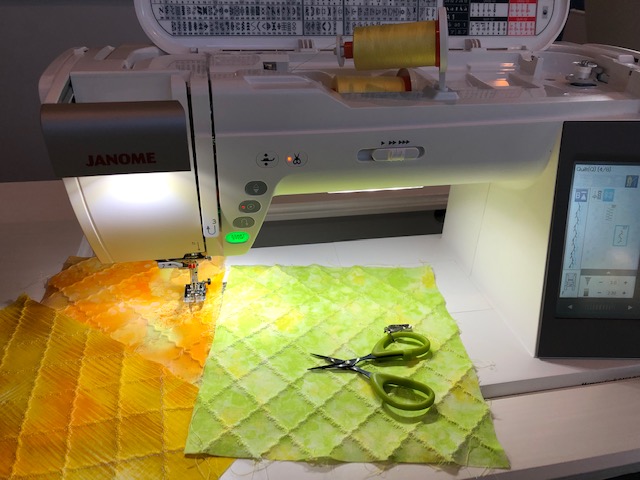
Once you have stitched your selected and customized stitch on sample fabric, you can begin stitching on your project fabric. If your machine has a guide, use it to keep your rows straight as you stitch. I begin by marking one diagonal line on the fabric with a Hera marker.
This is the type of hera marker I use. It is made by Clover.
Just look at the interesting texture created on the fabric by using a twin needle and a simple — but highly effective — stitch selection!
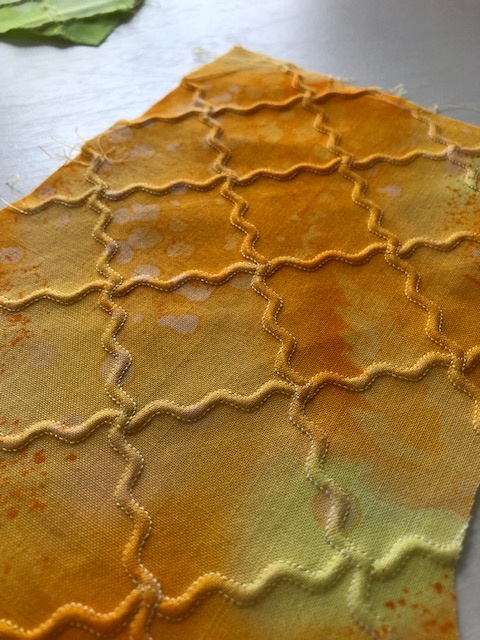
For my next block, I changed the stitch but kept the same twin needle in the machine. The stitch itself, with a single needle, looks like a basic utility stitch. But with the twin needle inserted just look at the difference!
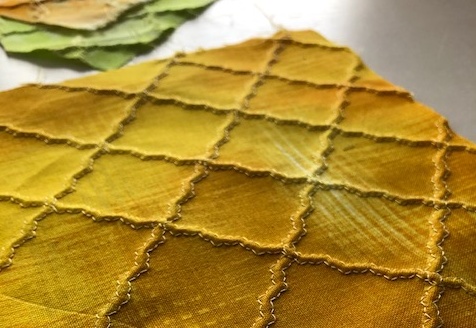
And for my third block, I chose yet another stitch using the twin needle.
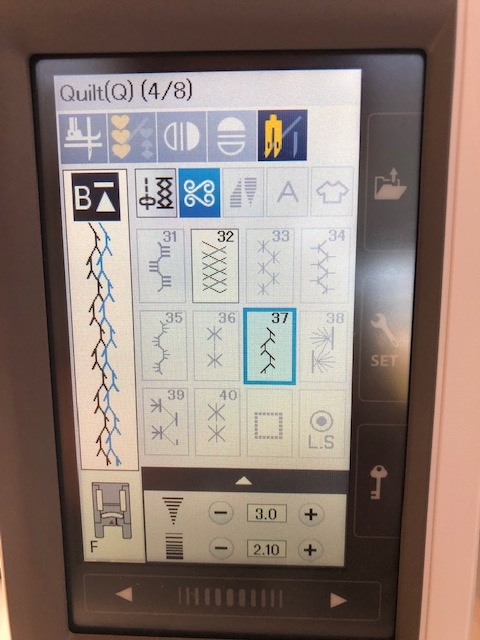
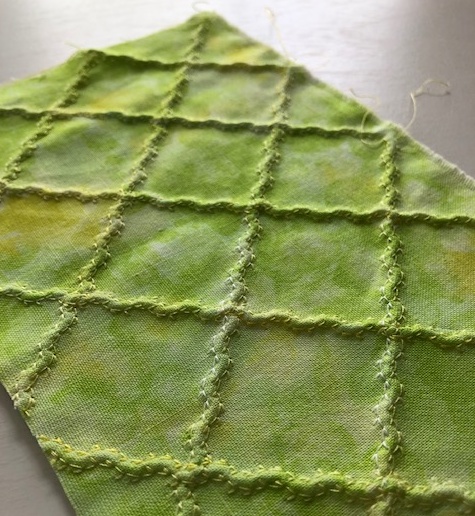
The distance between the rows is 1.5″. The size of the twin needle is 3.0. Those parameters stayed the same with each fabric piece I stitched. Only the actual stitch selection changed. I am just thrilled with the results!
A quick and easy project for you to try!
If you’d like to try making your own textured pineapple blocks, simply CLICK HERE to download a free machine applique pattern (seam allowances are not given, since this is meant to be fused and the raw edge stitched by machine); the same one I used. Pick some pretty fabrics and try this interesting, easy technique for creating texture on your fabrics. It’s fast and the results are oh-so-worth it!
Check back, because…..
….in the next blog post, I’ll share a fabulous idea for how to machine applique your pineapple blocks to the background fabric using some pretty stitches! Check back soon……


I can’t wait to try this when I get my machine back from being cleaned!! Thank you
Wow, that is amazing! Thank you Kim, for the information and inspiration!
Thank you, Kimberly! I have never experimented with twin needle work…but will now! Printing this blog as I write this!
I Love this…so Amazing…Thank you, Kimberly!!!
Love the look you get! It’s been a long time since I used twin needles. Need to try it again! Thanks
I have this machine and am having lots of trouble getting good consistent quarter inch seams. If anyone has advice, I’d appreciate it. Starting to think I wasted my money.
Oh no! Have you tried any of the 1/4″ presser feet? The OM foot? The HP foot and plate? Take some time and try these feet — the machine comes with so many options. Is your local Janome dealer nearby? Make an appointment to go in and sit with them for a bit. I’m sure they can show you how to get the PERFECT scant 1/4″ seam allowance. Also, did you read my blog post about the definition of a scant 1/4″ seam? Here’s the link: https://www.kimberlyeinmo.com/the-elusive-scant-1-4-seam-defined-and-conquered
I think you’ll find this very helpful.
I really love this quilt. So many wonderful colorful
fabrics. Pineapple means “Welcome”. You should publish a pattern book with a color chart of the many fabrics you
selected.
I love seeing your sweet Cheeto doing his job too. I absolutely love orange tabby cats. I had one years ago. I appreciate seeing the quilts you make.